Sunday, August 19, 2012

Summer Projects:

Hi Everyone!

I know I have been MIA for a while now, but I have a good reason. I visited my home country and family in South Africa. For ten whole weeks! That's right, 10! But just in case you thought I just sat on my behind and sipped wine, you are wrong...
Some days I sat on my behind and sipped wine, and other days I transformed furniture and sipped wine.... so there!
Yep! My sisters made me earn my keep... (but you know I did not complain about saving old, neglected furniture from the dump!)

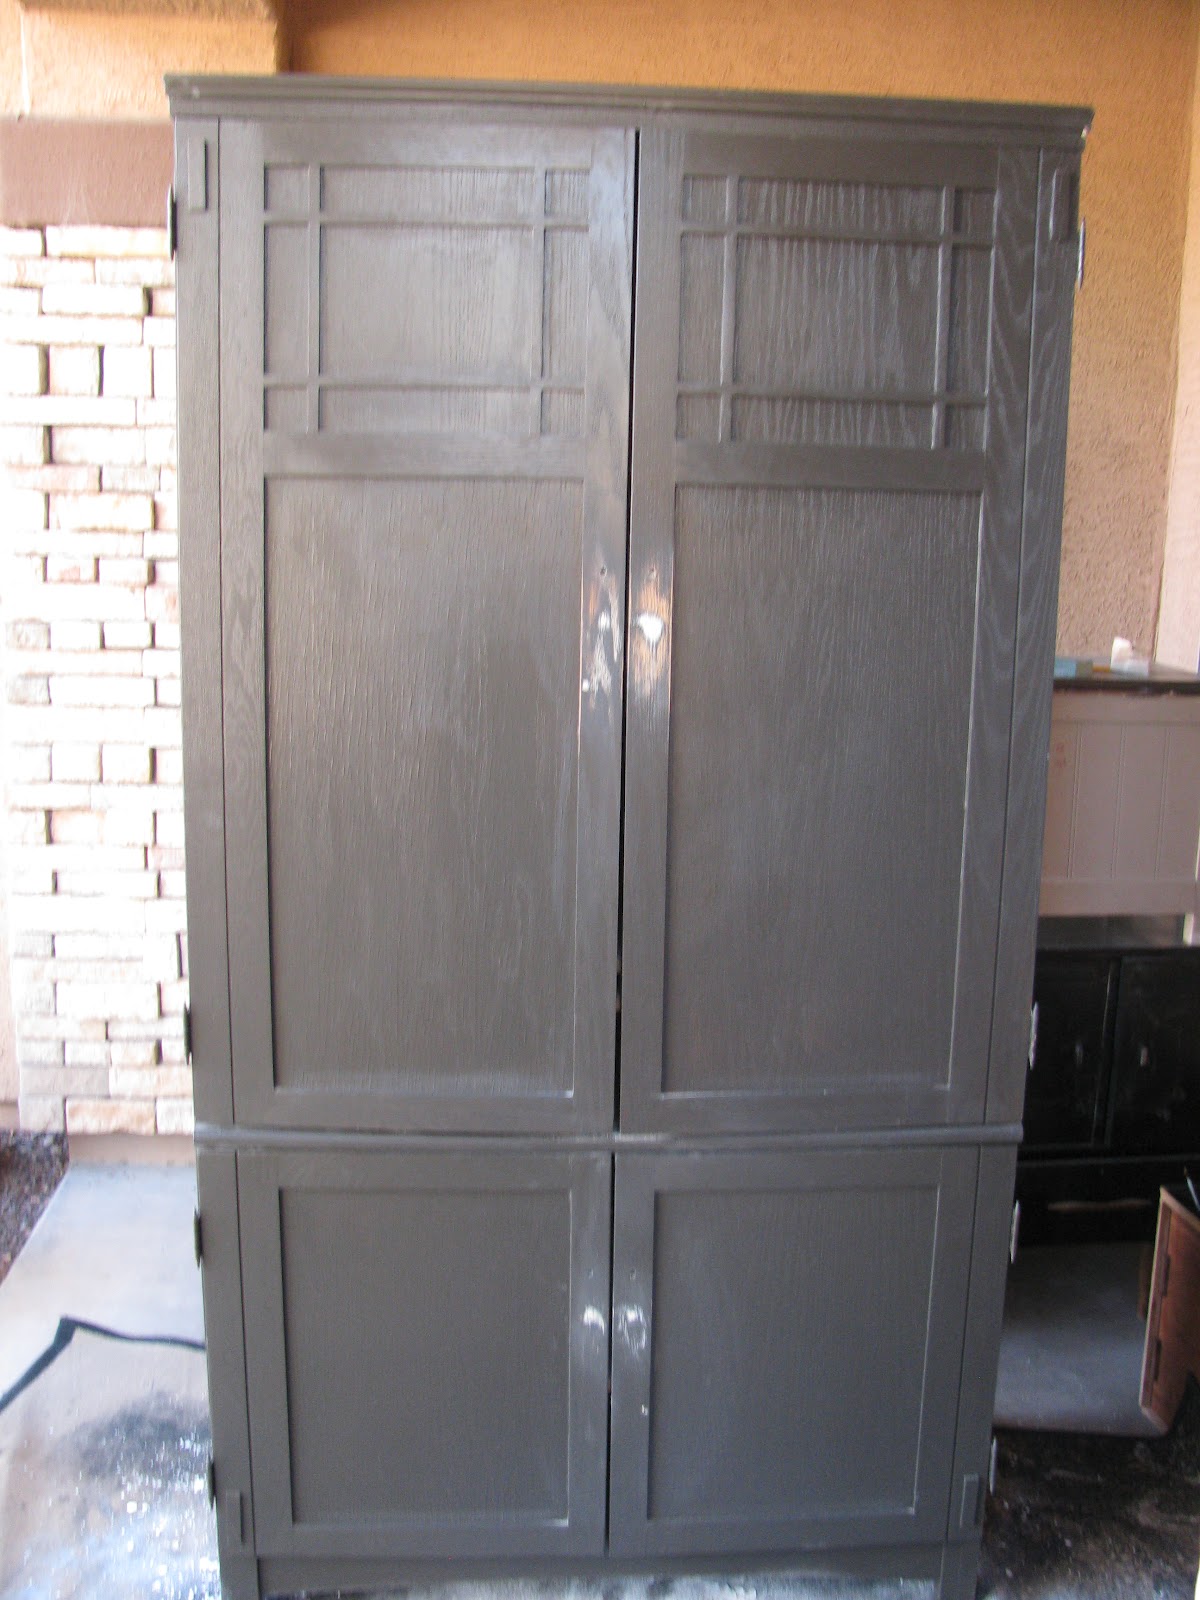
Look at this piece for instance: was once a built in kitchen cabinet, then stuck in the laundry, and eventually in the garage, where, as you can see, it had been used as a handyman table.

Old Built in Transformed to house a Stereo


My sister needed a place for one of her twin 16 year old sons' stereo, so we went to work on it. I liked the look of the sanded wood on top, so we just sanded it thoroughly (with NO palm sander available, I might add), and waxed it. We painted the body with homemade black chalk paint, and wiped a little brown stain over it, to give some depth to the mat black color.  After distressing the edges, and  adding wheels and funky hardware, this piece was transformed into a very cool, industrial look entertainment center any teenage boy can be proud of.

Don't you agree? And yes, I know the handles are different sizes. And no, it was not on purpose, OK? After we had drilled the holes and attached them, we stood back proudly to view our handy work, and  broke out in hysterical giggles when we realized our  mistake....
Then we decided to just pretend it was meant to be that way.


Old Bathroom Cabinet transformed
This little cabinet was brought home from the farm, and was stuck in storage for forever.
We had specific  plans for it, but it knew better....


When we started to sand it down, all these lovely layers, added through the years, were uncovered.
Then we realized that the door was not real wood, but supa wood...and, soon after, while I was sanding my heart out, the door fell open, slammed on the ground, and the mirror broke. This is when we decided to just go ahead and take the door off.

The lovely blue color on the inside, was left just as is...

..and just check out all the wonderful old layers...blue, green, yellow and white.
We did not bring a paintbrush near it..this look was achieved just by sanding!

It is going up as a shelf in her powder room.
Love it!

See ya soon with more Summer projects!


Sunday, May 27, 2012

Ugly Credenza gets a Make-over

Hi There!

And so my oldest baby got married last Saturday... he looked so handsome and grown-up! This is a picture of me and him,

 and this one of him and his beautiful bride. It was a really private and sweet ceremony.
I know they will be happy and successful.


Today I am sharing with you my most favorite of projects so far... or do I say that every time? I guess that means I love what I do, right?
I bought this credenza, or buffet, on craigslist, looking very sad with a "most unfortunate" paint job...
But, I loved its lines, and only learned after that this is typical a mid-century piece.

It stayed at my front door for quite some time, waiting its turn to get an "extreme make-over".
Of course I forgot to take a before picture.....( have decided to take pics of the pieces as I purchase them, so as not to have this "particular" problem again...We'll see how that goes...)

At least I can show you what the two discarded drawers looked like...and that is a pretty good indication of the state of the rest of the piece. Bad, gloss black paint finish, with drip marks and peeling paint (not the nice kind, either) everywhere. These two drawers did not fit snugly, as a result of some swelling, or slight warping? I don't know, but they seemed too big for the space.
So, thanks to many other bloggers before me who have paved the way, I knew that I could just leave them out, and turn the empty spaces into shelves.

I had a completely different plan for this piece, but when I started sanding and saw the beautiful wood tone underneath , I changed my mind. (I think its actually just really thick veneer, but it still had a lovely warm tone.)

The doors had a sweet little black line in the wood, which I thought deserved a second chance to shine. So I sanded them down, and stained them a beautiful warm tone. Along with new hardware, they look awesome, don't you think?
I did the same with the top, but then painted a checkered black and wood pattern on it.


The drawers got a reverse stencil of 1,2,3, with numbers I printed off the computer, cut out, and sprayed with spray on glue.


The shelves on the bottom are now ideal for a DVR, or displaying of your favorite crockery.
I took this one to our booth at Armadillo Antique mall, Goodyear, and it sold within 24 hours!
I would have liked to keep it myself, too!
Now I have to get painting to get stuff in the booth before I leave for South Africa for two whole months.....    


                  Love,                           


Sunday, May 13, 2012

Union Jack Coffee Table

Happy Mother's Day to all the wonderful mothers out there! Hope you are spo

iled and appreciated, not only today, but every other day, too. I want to show you my version of the Union Jack trend...


I have been itching to paint something in Union Jack, and thought that this little table was due for another make-over.  This is how I transformed it when I first got it.
It was perfect, since it already had the red, and I just had to add the white and blue.


Although I did touch the red up, some, too, to make it brighter.

My husband really liked it, all perfect and flawless, like above...

 He was a little disgusted when I started sanding and distressing it! LOL.


But I like it more just a little bit distressed and imperfect...don't you agree?
I sold it to a guy in Phoenix who bought it for his girlfriend, who is from Britain..
Perfect!

Have a great Mother's Day!
Suzanne

Joining these parties:
 

See other parties here


Monday, April 16, 2012

From Armoire to Craft/sewing/work Station

Hello Again!

Remember me? Won't blame you if you don't.

Things have been C.R.A.Z.Y. here, to say the least! I have one son getting married, another going to senior prom and graduating, and a 38 hour flight to South Africa, for a long overdue vacation with my sisters, all taking place the last two weeks of May! Oi ! In between trying to get organized for the above mentioned events, I have also tried to get a few projects done. All of which have resulted in Yours Truly being very behind in all things domestic!

 Suffice to say that I am just a teeeensy bit stressed out right about now. Not to mention the fact that I am about to be  " Mother of the Groom"! O my goodness, that even sounds wrong! Wasn't it yesterday that I was the bride? What do I wear, by the way? All the "Mother of the Groom-ish" outfits reminds me of the Queen-mother, for some reason. I am not ready to look like the Queen-mother!

Anywoo...enough of that.

This is my latest project:

BEFORE...                                                                   AFTER                                                                                                       
                                                                                                                           
Armoire bought on Craigslist
Transformed into Craft Station


The front doors were Modge Podged with fabric I had , and two small chalk boards
above serve to write inspiring words, messages, etc. on.
The side ...is the result of many, many attempts,  "colorful language",and time spent coloring .
This was one of the less successful attempts....
Yes, I ran out of painter's tape, and used red duct tape...


The inside is what I am the most proud of:
I replaced the back with peg board, that I painted black,
and put hooks, a rod for gift wrap or ribbon, and baskets up.
An empty coffee container and tuna can, decoupaged in the same pattern, serve as fun "hold alls".


The inside of one door was painted in chalk board paint, for messages and reminders, and the inside of the other door has a cork board for pictures, etc.
The outside is home made black chalk paint.

Did you notice the knobs? I modged podged the two bottom ones with the same fabric, and replaced the top ones with the black squirlies..

Do you think this will make some woman happy?
 I hope so!
I'm selling it on Craigslist.


I am joining these parties....


Monday, March 5, 2012

Pine Cabinet Reinvented

A Big Dream of mine has been realized....At last an antique mall opened in our city...a mere two blocks from where I live!
But that's not all...Yours Truly put her big girl panties on and GOT A BOOTH THERE!!!!!!
omg!omg!omg! What was I thinking?!!!
(Deep breath)
Ok, first of all, I'm not all by myself in this. There are three other very talented and creative ladies sharing the booth.
It all happened so fast! On Thursday my friend, Stacy, called and told me about the new antique mall , The Brass Armadillo,that opened up near us, and she wanted to know if I was interested in sharing a booth  there. Uhm...heck yeah! We went and looked, picked a booth, and on Friday we signed for it...Her mom, and another friend who has done this kind of thing before, is renting it with us.

Today I started working on a few outstanding projects, to stock our booth.

I bought this little pine cabinet like this...

I sanded a little, and took the panels out of the doors. (it looked like a previous owner added them later, anyway)
I used my homemade version of chalk paint, painting the body in a Aqua color and the door and shelves in white.
Then came the sanding, distressing,and glazing.

 And of course some chicken wire to fill the openings in the door...


Hopefully it looks like a really old piece from an old farmhouse or something.


I think I would have bought it if I saw it in an antique mall, wouldn't you?
If you live in Phoenix, come stop by the Brass Armadillo in Goodyear!
You won't be disappointed!

Bye for now!


Joining these Parties

Saturday, January 28, 2012

Fun Bench...just for fun!

I bought a cute little bench at a garage sale a few years back. Since then, it has occupied many different rooms and played many different roles in our house. First it was used in my daughter's bedroom to hold all of her different soft toys....

Then I moved it to my guest bathroom, where I thought it fit perfectly....just to look pretty and maybe hold the occasional item of clothing while someone was taking a shower...

One day I decided to paint it, and moved it outside to the patio, where the poor thing resided, half-way primed, for a whole year!
I am surprised it survived the elements all that time. Must be of good "stock"!

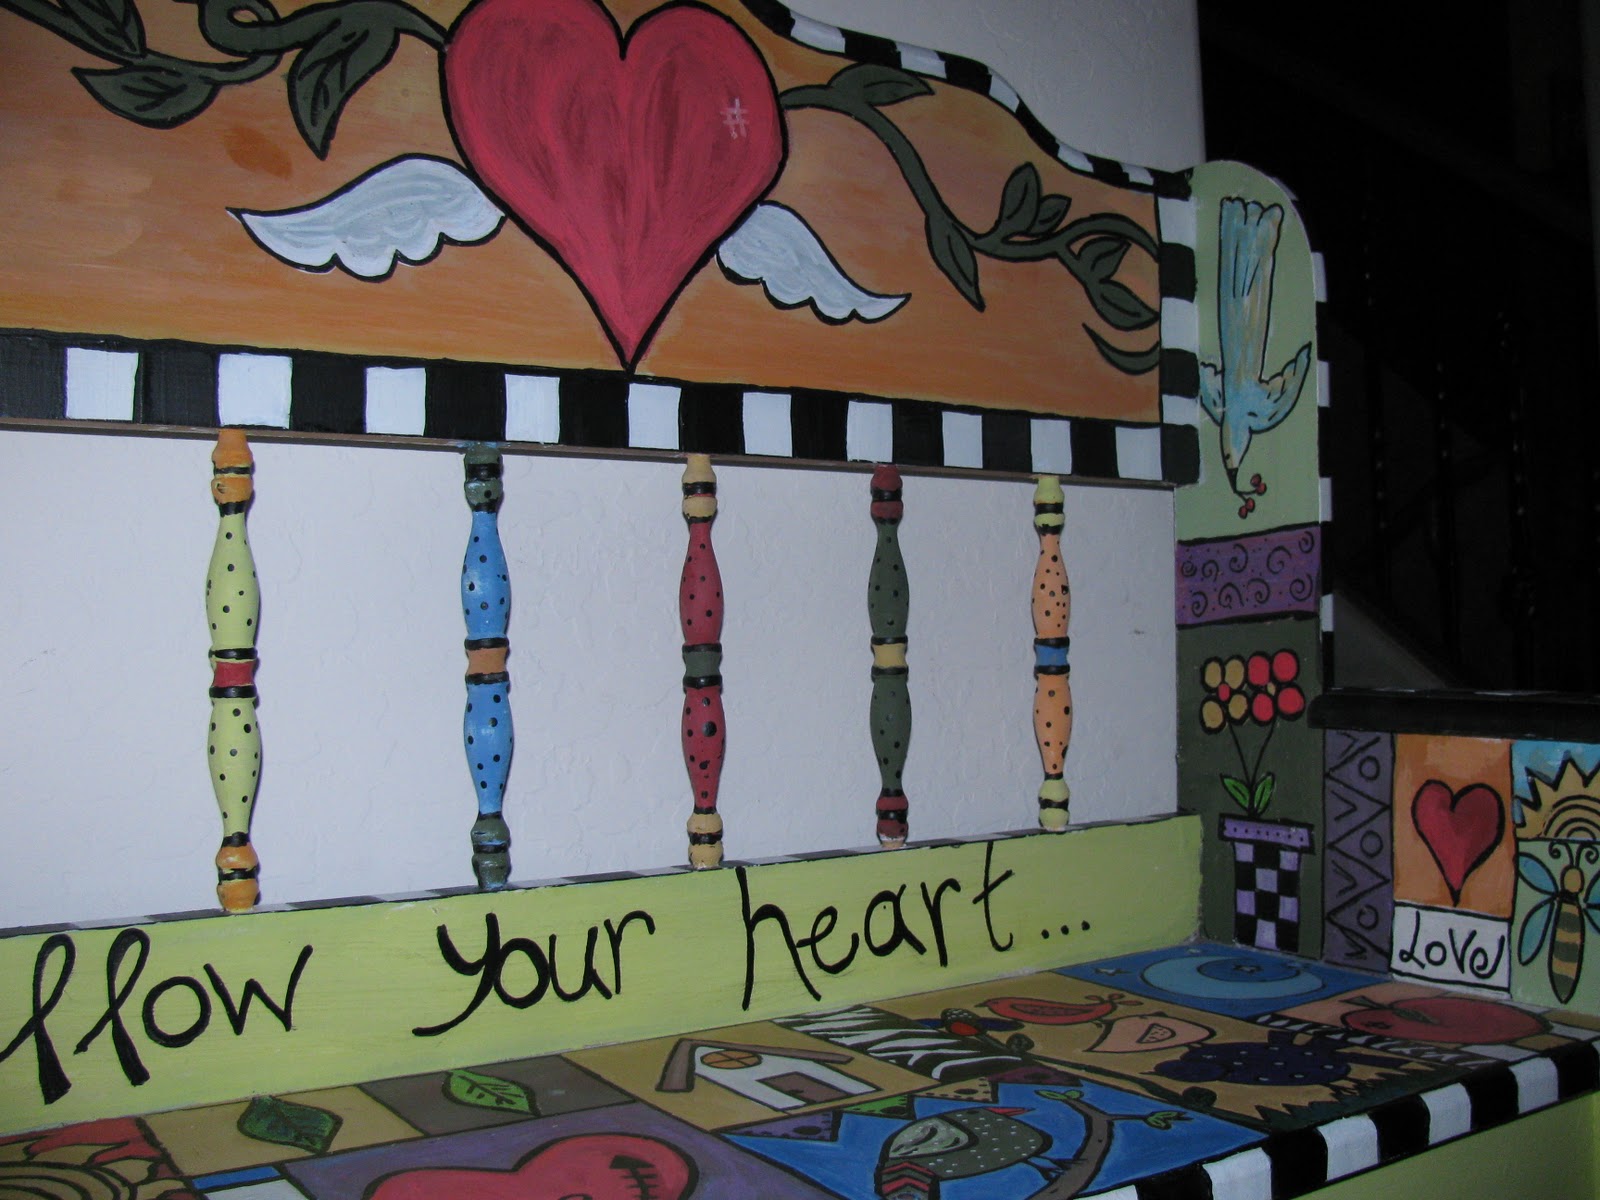
Last week, I decided to tackle this brave little bench again. I was itching to do something resembling "Sticks furniture".
I have LOVED Sticks Furniture since the first day I saw it about 8 years ago. I did not know who or what it was, but I WANTED it! Unfortunately I could not afford to pay $3000.00 and up for any piece of furniture, so it remained an unrequited love affair.
Until I started painting old thrift store furniture and realized I might even try my hand at something like that one day!
Well, the day has arrived! And I had tons of fun doing it!

I removed the original embellishment, and was going to glue a wooden heart there, but ended up just painting one on.

 I wrote: Follow your heart....but take your head with you..


 I used any and all the paint I could find in my stash. The lines were done with Sharpies and paint pens.


 I think this can be used in a child's room, or playroom, or even as an unexpected accent piece in any decor. I am sure it will also look very cute on either a back or front patio, too.

What do you think?

Suzanne


Joining all these parties