Showing posts with label furniture painting. Show all posts

Tuesday, October 7, 2014

Locker Mania


Oh, Goodwill! Just when I'm ready to break up with you , you surprise me with something cool..

I have been a smidge irritated with Goodwill for months now. It seems "they" got wind of the whole "refinishing crappy furniture to look cool again" trend, and "they" have been hiking their prices up so much that I hardly went there anymore.

Lucky for me ( and "them"... I used to be a frequent customer, after all),  my daughter started going for Occupational Therapy at a therapist right behind a Goodwill. So what's a girl to do when she's checked her e-mail  and Facebook  and Pinterest and Offer Up  and Craigslist , and it's still more than half an hour before her child gets done at the OT?  Go browse in Goodwill, of course.

I have been drooling over the industrial style lockers on Pinterest, but whenever I saw any on Craigslist or OfferUp, they were way more than what I was willing to pay. So, great was my excitement when I saw this cabinet there!


I know, it doesn't come close to a real locker, but I was convinced I could work with it. Especially when I saw the price! $14.99 , plus I had my 20% off coupon! SOLD to me!!!

When I got home I soon realized that I would need a lot of paint stripper. The top layer boring white paint was just regular paint, but the original paint was almost like plastic..yuck!

Luckily I was not planning on stripping all of the paint off. The idea was to leave some on, for the layers of peeling paint look.


I recently discovered that Jo-Anne's and Michaels also stock chalk paint.
I got this one at Michaels for $9.99 less 50% with my coupon. Score!!


I painted it on unevenly, with some of the nice, rusted steel parts and some white paint still showing. Sanding with 150 grit sandpaper and applying this wax, gave it a smooth, silky feel.
               
                                                                                     .


I love how it turned out!
Oh ya! And check out the numbers on the "locker " doors!


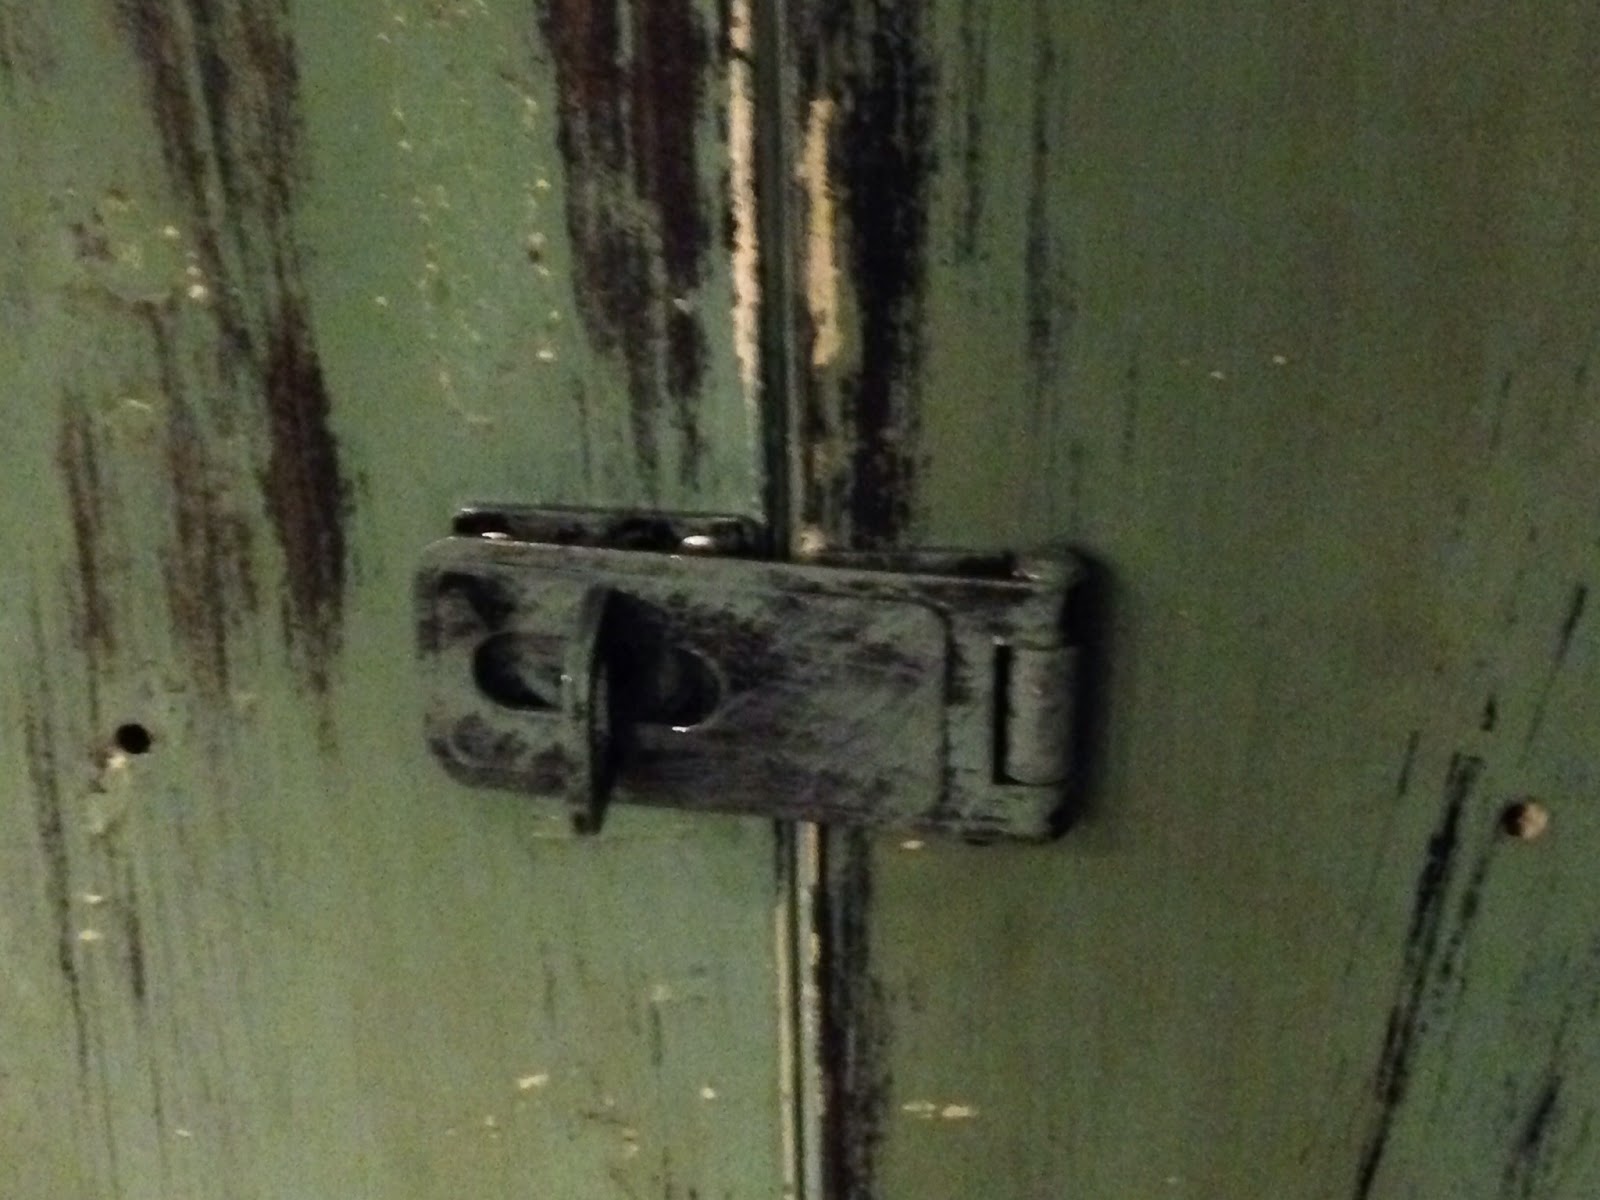
I also replaced the boring hardware with this . Just a very shiny lock thingy from Lowe's, spray painted black and then painted over with the same paint I used on the cabinet. I didn't worry about the two extra holes from the old hardware. I think it adds to the industrial look.


Had to enlist Hubby's help to add metal castors (ordered on Amazon) at the bottom.


I was at first planning on selling this , but now, of course, I can't get myself to part with it.
For the time being, it will serve as my liquor cabinet...


What do you think? Any other ideas for where to use it?


                                                            Love,


Friday, June 6, 2014

Kitchen Nook for the Newly Weds


Hi Everyone!
 I hope you are all having a wonderful, creative, summer. We just visited our home country, South Africa, in April and May, and I came back all enthusiastic to do STUFF!!

But first, I need to catch up on showing some older projects that got "Left Behind".

About a year ago, when my son and his new wife were getting ready to move into their own place, I saw these cute chairs at Savers, for $5 each. They reminded me of a bentwood chair, but were metal (of course...geez, wouldn't it be a bargain if it was a real bentwood chair...).


This picture was taken after I had already spray painted the frame. It was a bad paint job with beige paint before. The plastic cover screamed "family with small children!" , and somehow I did not think it would fly with my two newly weds. They are very young, and still have a lot of adventures planned before parenthood "cramps their style". 

Luckily I had this sweet fabric that I got a while before that. I intended to add splashes of yellow, grey and aqua to my living room at one point, but somehow never got around to it.
Covering the seats was an easy job, thanks to my handy dandy staple gun.

Pretty, isn't it?
I bet you spotted the turquoise piece of table in the pic, right? How could I not make the table turquoise? It was perfect!! 
I bought this table at  Goodwill years ago.

     It began its new life in my home with a pretty red, distressed coat. In the early years I never painted with a brush, always spray painted. Now it's just the opposite. But, all this to say, this table was spray painted red and glazed with black. If I could find out how to add a link with my iPad, I would link you to that post, but, until I learn how, you will just have to either believe me or go look for it on my blog. ( sorry!!)


I loved it just like that for many years, but now it was time for a change yet again.
I painted it with paint I already had on hand. It came in handy, since we were also moving, and I wanted to get rid of some of my open paint containers.

Of course it also got some very light distressing and a smudge of charcoal glaze.

...and there it is! A fresh, sweet breakfast nook for the newly weds! ( the fourth chair was late, and could unfortunately not make it in time for the picture.. ;). )
Spot the chaos of moving boxes in the background.

I'm very happy how this little set turned out. So bright and cheerful, don't you think? 

Well, hopefully this inspired you into some action, if you needed a little kick in the bee hind! 

                                        Cheers!!
                                        

                                      Suzanne.....


Tuesday, April 9, 2013

Faux Pewter Desk


Hi Girls! (Guys, Dudes, Peeps, Friends, Ladies, and Gentlemen)

I know I promised I would post about another French desk next..but you know better than to believe me by now, right? I also said I was going to stop saying the F word on occasion, drink less wine, eat less, and work out more. Bwhahahaha!
Although, I did join CrossFit and am going three times a week, and it turns out I love it! Who knew I was such a masochist ? LOL
One of these days I will be posting pictures of me in my bikini showing off my muscles...
Don't worry! Just kidding! (maybe..)

This is yet another desk, and I am using my standard before picture, because, well, they all look like this more or less...
And yes, I totally planned it this way. I did not forget the before picture...
 
I have been drooling over these kinds of pieces at Worldmarket..

So, I decided to combine the two effects and ended up with this:
I had some trouble with getting the wood part exactly like I envisioned, and I settled for this look, which almost looks like rusted metal to me.
I know, the more professional furniture transformers out there would have practised on a small piece until they got it right, but as our own dear Miss Sweet Brown so
 aptly put it : " Ain't Nobody got Time for That!"   LOL.

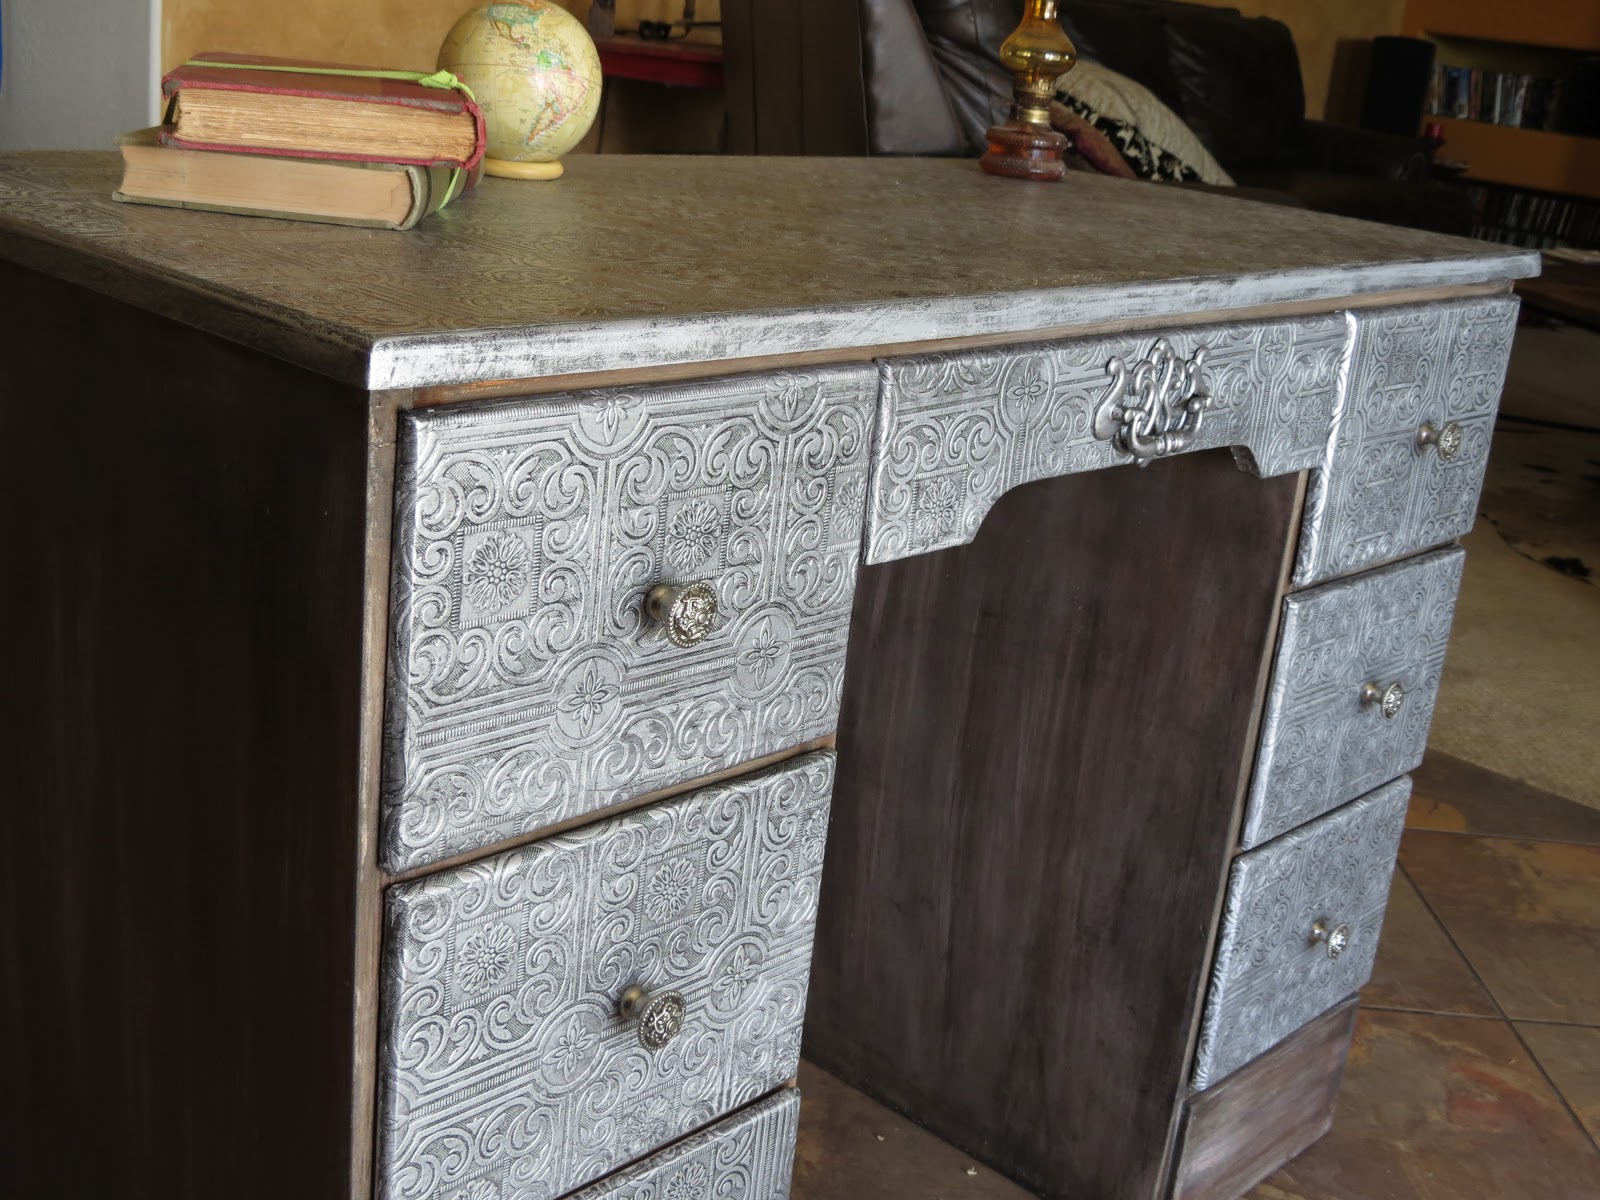
 For the drawers and top I used the last of the textured wallpaper that bought about 8 years ago at Lowes. What a great buy that was!  I really hope I can find some more somewhere. It has the look of ceiling tile, don't you think?
 Of course it was white when I put it on, and I  primed and sprayed it with Rustoleum Metallic Silver after the glue had dried.

Then I painted on some charcoal tinted glaze, and wiped it off with a dry rag. ( I'm guessing son no 2 won't be wearing his "holy" underpants again..lol)
 
 It really gives the impression of pewter, don't you think?
 
 The knobs are from Hobby Lobby. At less 50% they were almost as cheap as buying a mish mash at Habitat Restore.

For the middle drawer,  I used an old pull I got off another piece and just painted it to match.
 
 
Of course I sealed it all with a couple layers of MinWax Policrylic.
 
I have to admit that I am really pleased with the end result...
Won't mind keeping it for myself...
 
Ok! Let me hear those comments!
Love
Suzanne
xoxo


Thursday, March 7, 2013

You've got Mail...(from France)

Hi There!
In Phoenix, Spring has sprung...or should I say "Summer's here! Bummer!"  I actually had to turn the air on yesterday afternoon! It was 83 in my bedroom. Between that and the hormones, I was spending a big portion of the day on my bed, under the ceiling fan, doing "research" . ( checking out Pinterest)

Anywoo...check out my latest desk... I just sold it this morning to the sweetest newly -wed couple.
 
It started out as a regular, brown wood desk, with those "swirly" brass handles.
 
 
Now, if you are one of those "teacher's pet" kind of readers, who always notice little discrepancies, then, yes, I know, the dresser in the before picture's feet are different than the one in the "after" picture.
There is a very good explanation for that. The reason is, that I cheated. This is actually a "before" of another desk I did a couple years ago..
Because I forgot to take a before picture of this one. Because I just can't seem to make myself remember these things. Because I get too excited once I start working on a piece...because I'm pre- menopausal...whatever!
 
I was itching to do a piece with some French postcards, or stamps, or mail. So, I googled some stamp images, and decoupaged them on. I used a dinner plate and salad pate as templates for the round stamps., and I freehanded the written parts.
 
 
The top three drawers were modge podged with fabric I got at Goodwill for a steal probably  two years ago. Yes! Can you believe it? It is coming in handy now with all things French being so popular  these days.
I was going to modge podge the top with the same fabric, but once I sanded it off, it looked so nice, that I just stained it in Ebony.
A word of warning: If you put the stain on the desk to take a picture, remember to remove it again before you lift the side of the desk to paint a leg..Failure to do so might result in the stain being splattered all over the floor..
Just sayin...in case someone is so..uhm "forgetful"
 
 I love how rich it looks.


Of course I changed out the drawer pulls, but I bet you can't guess what these were originally..
They are curtain rod ends (or finials)....bought at a thrift store for a buck a pair!
 Worked like a charm!

One last look, and tell me what you think...


Next week I'll share another desk I did with the same fabric.
Until then..
Happy Thrifting!


Linking to:
Time Travel Thursday
Metamorphosis Monday

http://www.alittleknickknack.com/" target="_blank">http://i166.photobucket.com/albums/u87/auntdoi/knickknackbuttonpartybutton.png
" />


Tuesday, February 5, 2013

Breakfast at Tiffany's

Hi There!
Well, its about time I share the long promised "Breakfast at Tiffany's" dresser...
I saw the little dresser at Goodwill one day, and fell in love with the shape. I knew exactly what I was going to do with it! There was just one smelly problem....it smelled bad! Really bad. I don't know if it was just smoke, or a combination of dampness and smoke, but that smell would not leave...
I took out all the drawers, sprayed it with bleach water, left it in the sun for more than a month, but no improvement. I tried baking soda, vanilla essence, more bleach, more sun, more spraying with the hose...still stank to high heaven.
So, I decided to just try Kilz primer...painted on, not sprayed. It worked! Not a smell ... yay for Kilz!!!
Ater priming, I painted with a sort of seafoam blue I had, and then used my projector to project an image of Audrey Hepburn onto it. The rest was filled in with small brushes and black and grey paint..


Ta Da!!!!

I love love love this look! But I have a confession to make...
It was not my original idea ...I stole this from Deneen at Dreaming in Color . Only she is a real artist, and did not need a projector.
But ever since I saw her sweet little dresser, I knew I wanted to do something like it.
She is very talented, and her blog is choc full of inspiration. Go stop by her blog and tell her I sent you...     ;-)


Do you want to have another look?


 The rounded corners looked sort of retro to me...


 I lined the drawers with wall paper I had.


Hope you liked it!
Happy Thrifting!

Suzanne
xoxo

Linking up with:
Metamorphosis Monday

http://diyshowoff.com/category/other/that-diy-party/" title="DIY Show Off">http://i899.photobucket.com/albums/ac195/Roeshel/thatdiyparty125button_zps360f71b1.jpg
" alt="DIY Show Off" style="border:none;" />Read more at http://diyshowoff.com/2013/02/10/that-diy-party-3/#T5TU8ztmkuLZw15Z.99 Keeping It Simple