Showing posts with label paint. Show all posts

Friday, June 6, 2014

Kitchen Nook for the Newly Weds


Hi Everyone!
 I hope you are all having a wonderful, creative, summer. We just visited our home country, South Africa, in April and May, and I came back all enthusiastic to do STUFF!!

But first, I need to catch up on showing some older projects that got "Left Behind".

About a year ago, when my son and his new wife were getting ready to move into their own place, I saw these cute chairs at Savers, for $5 each. They reminded me of a bentwood chair, but were metal (of course...geez, wouldn't it be a bargain if it was a real bentwood chair...).


This picture was taken after I had already spray painted the frame. It was a bad paint job with beige paint before. The plastic cover screamed "family with small children!" , and somehow I did not think it would fly with my two newly weds. They are very young, and still have a lot of adventures planned before parenthood "cramps their style". 

Luckily I had this sweet fabric that I got a while before that. I intended to add splashes of yellow, grey and aqua to my living room at one point, but somehow never got around to it.
Covering the seats was an easy job, thanks to my handy dandy staple gun.

Pretty, isn't it?
I bet you spotted the turquoise piece of table in the pic, right? How could I not make the table turquoise? It was perfect!! 
I bought this table at  Goodwill years ago.

     It began its new life in my home with a pretty red, distressed coat. In the early years I never painted with a brush, always spray painted. Now it's just the opposite. But, all this to say, this table was spray painted red and glazed with black. If I could find out how to add a link with my iPad, I would link you to that post, but, until I learn how, you will just have to either believe me or go look for it on my blog. ( sorry!!)


I loved it just like that for many years, but now it was time for a change yet again.
I painted it with paint I already had on hand. It came in handy, since we were also moving, and I wanted to get rid of some of my open paint containers.

Of course it also got some very light distressing and a smudge of charcoal glaze.

...and there it is! A fresh, sweet breakfast nook for the newly weds! ( the fourth chair was late, and could unfortunately not make it in time for the picture.. ;). )
Spot the chaos of moving boxes in the background.

I'm very happy how this little set turned out. So bright and cheerful, don't you think? 

Well, hopefully this inspired you into some action, if you needed a little kick in the bee hind! 

                                        Cheers!!
                                        

                                      Suzanne.....


Tuesday, April 9, 2013

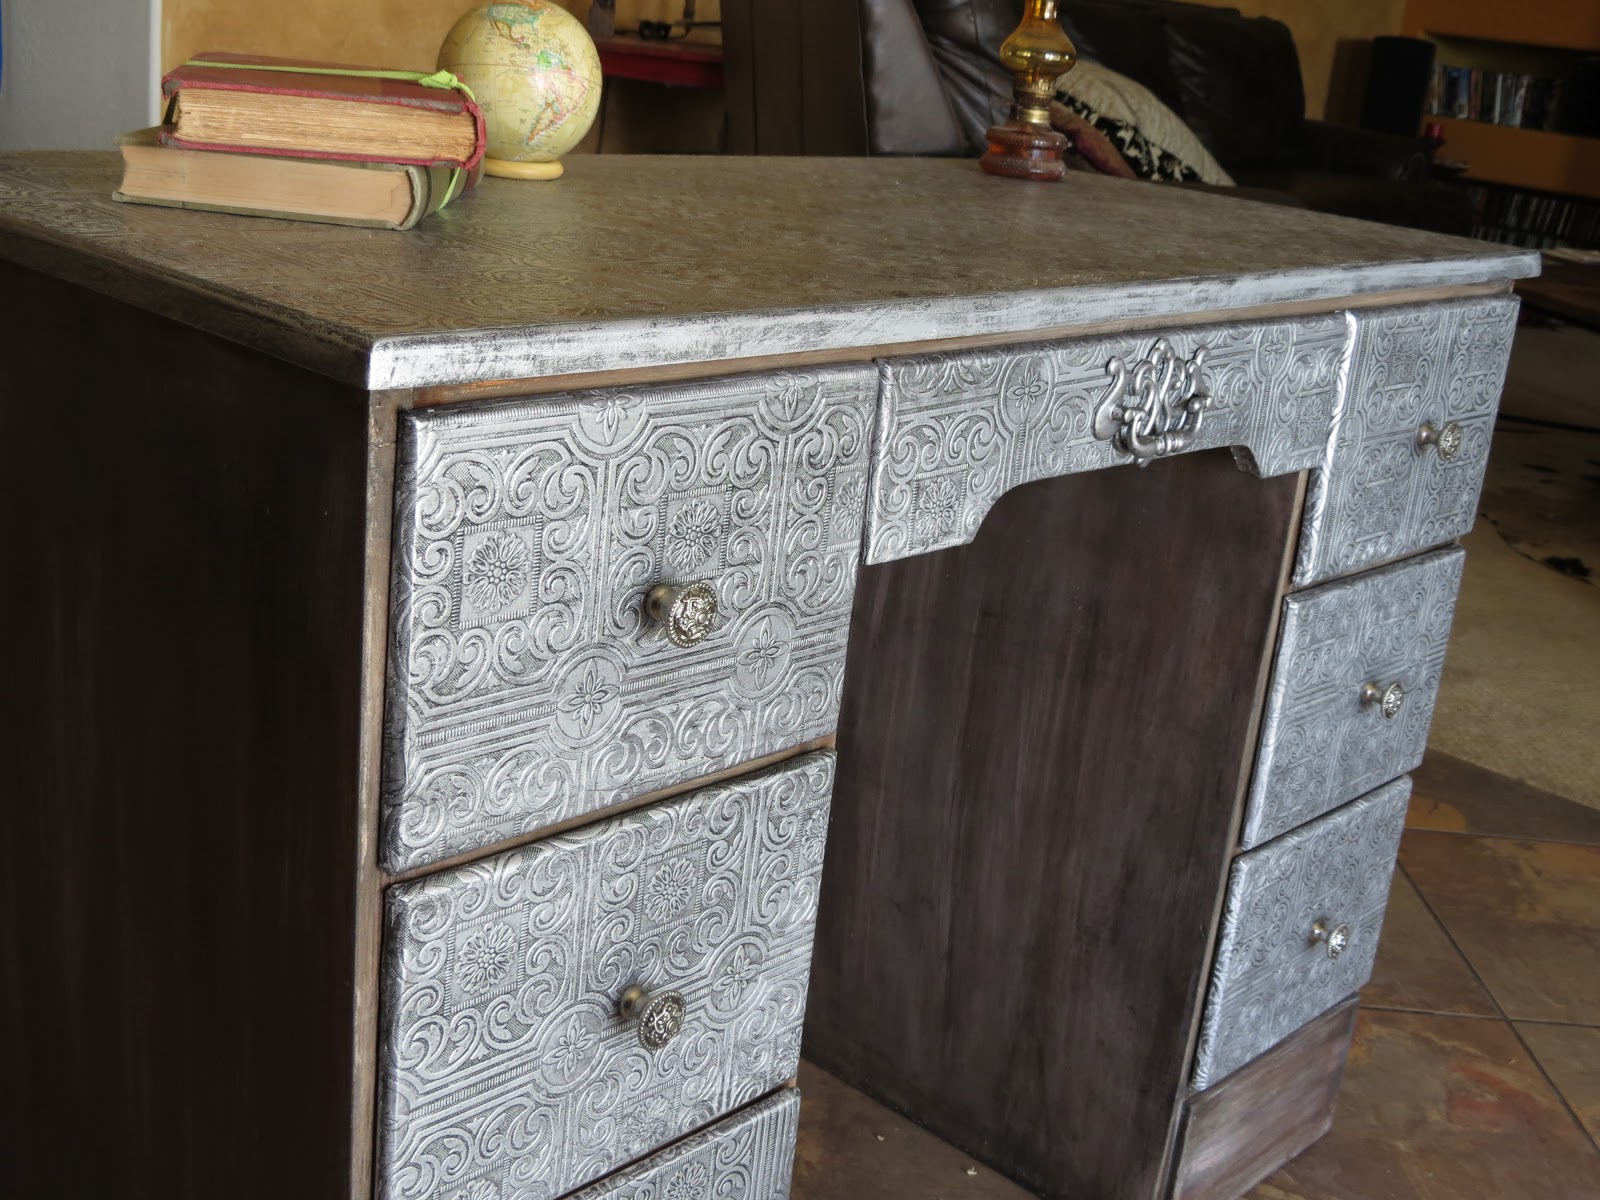
Faux Pewter Desk


Hi Girls! (Guys, Dudes, Peeps, Friends, Ladies, and Gentlemen)

I know I promised I would post about another French desk next..but you know better than to believe me by now, right? I also said I was going to stop saying the F word on occasion, drink less wine, eat less, and work out more. Bwhahahaha!
Although, I did join CrossFit and am going three times a week, and it turns out I love it! Who knew I was such a masochist ? LOL
One of these days I will be posting pictures of me in my bikini showing off my muscles...
Don't worry! Just kidding! (maybe..)

This is yet another desk, and I am using my standard before picture, because, well, they all look like this more or less...
And yes, I totally planned it this way. I did not forget the before picture...
 
I have been drooling over these kinds of pieces at Worldmarket..

So, I decided to combine the two effects and ended up with this:
I had some trouble with getting the wood part exactly like I envisioned, and I settled for this look, which almost looks like rusted metal to me.
I know, the more professional furniture transformers out there would have practised on a small piece until they got it right, but as our own dear Miss Sweet Brown so
 aptly put it : " Ain't Nobody got Time for That!"   LOL.

 For the drawers and top I used the last of the textured wallpaper that bought about 8 years ago at Lowes. What a great buy that was!  I really hope I can find some more somewhere. It has the look of ceiling tile, don't you think?
 Of course it was white when I put it on, and I  primed and sprayed it with Rustoleum Metallic Silver after the glue had dried.

Then I painted on some charcoal tinted glaze, and wiped it off with a dry rag. ( I'm guessing son no 2 won't be wearing his "holy" underpants again..lol)
 
 It really gives the impression of pewter, don't you think?
 
 The knobs are from Hobby Lobby. At less 50% they were almost as cheap as buying a mish mash at Habitat Restore.

For the middle drawer,  I used an old pull I got off another piece and just painted it to match.
 
 
Of course I sealed it all with a couple layers of MinWax Policrylic.
 
I have to admit that I am really pleased with the end result...
Won't mind keeping it for myself...
 
Ok! Let me hear those comments!
Love
Suzanne
xoxo


Thursday, January 3, 2013

Silver Buffet

Happy New Year Everyone!
May 2013 be a wonderful year for you all. I am confident that this will be the year of goals reached, dreams come true, and resolutions kept...  
{well, two out of three won't be bad, would it? ;-) }

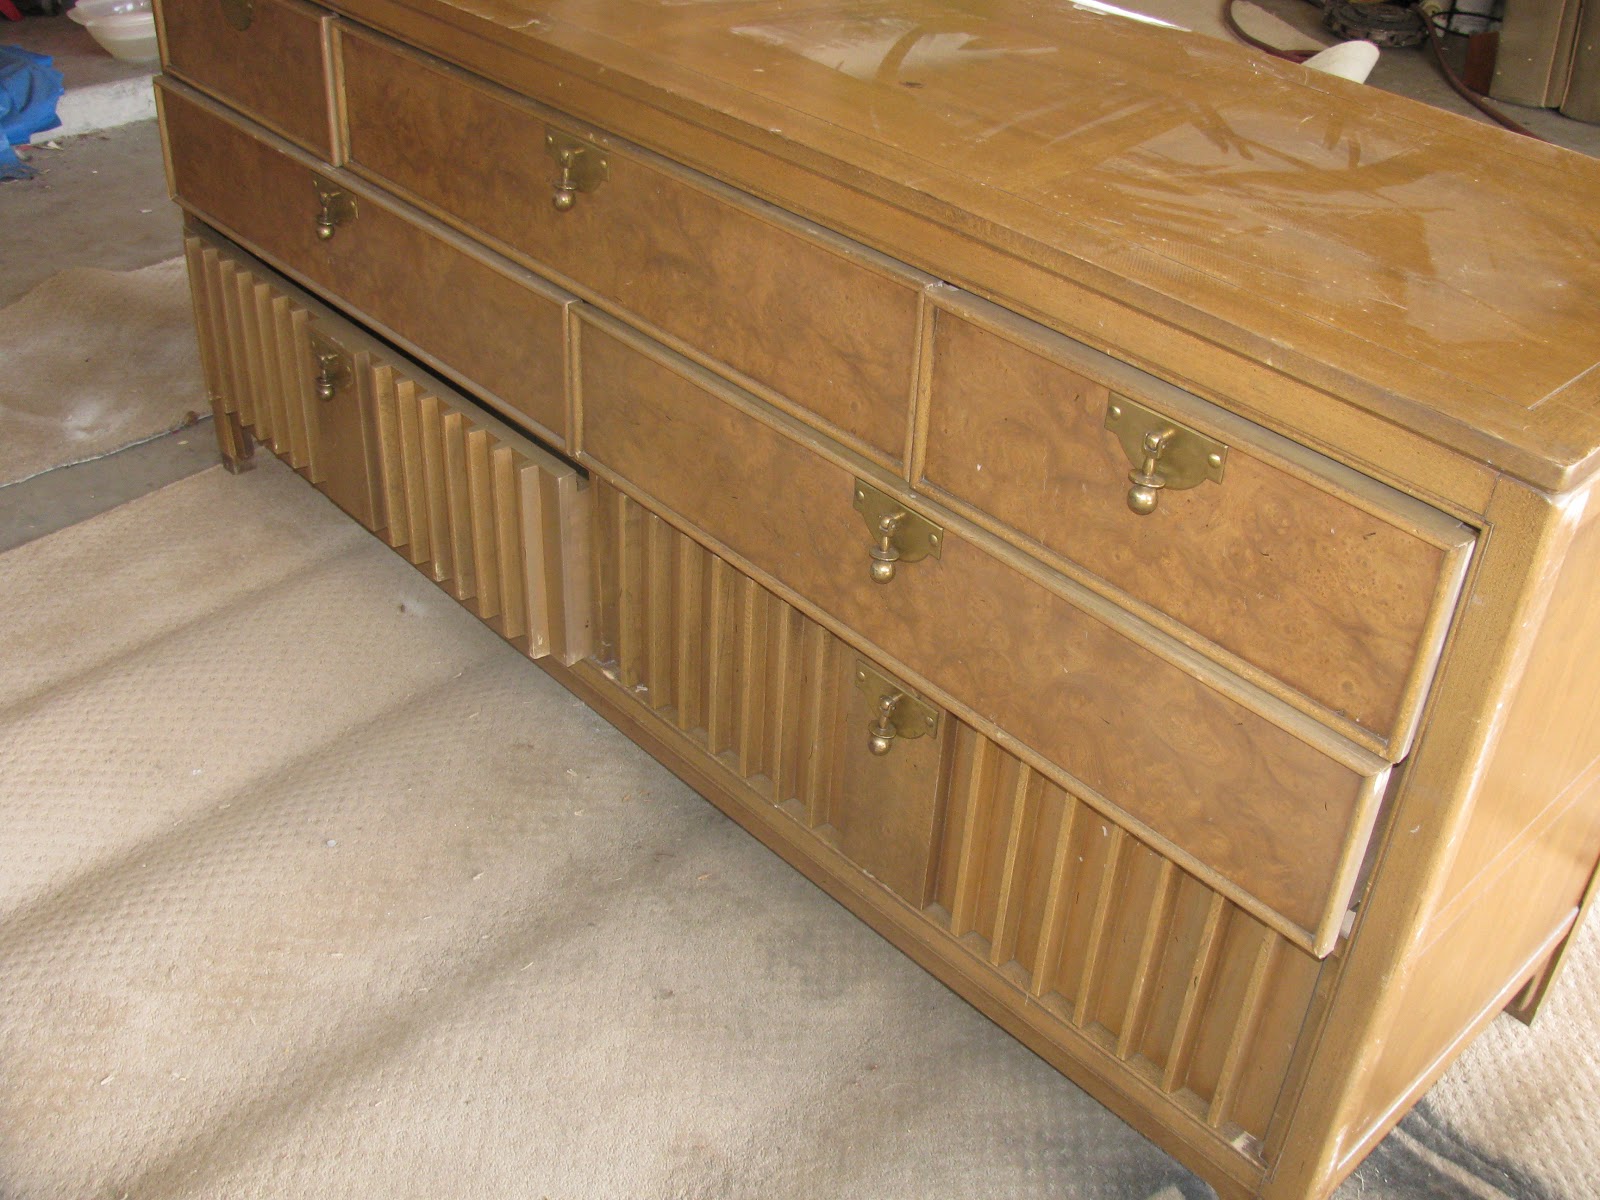
Just look at this cool piece I bought easily a year ago on Craigslist. I think it would have looked very nice just like this, but unfortunately the veneer was chipping in places. So, I did not have to debate with myself very long whether to paint or not to paint. Pshhh! As if ......


I decided to try some version of the currently popular silver/metallic/mirror furniture. Only I wanted to do the cheapest version possible, of course.  That's why I used spray paint again for the first time in a long, long while. Also because of the many small grooves on the two bottom drawers.

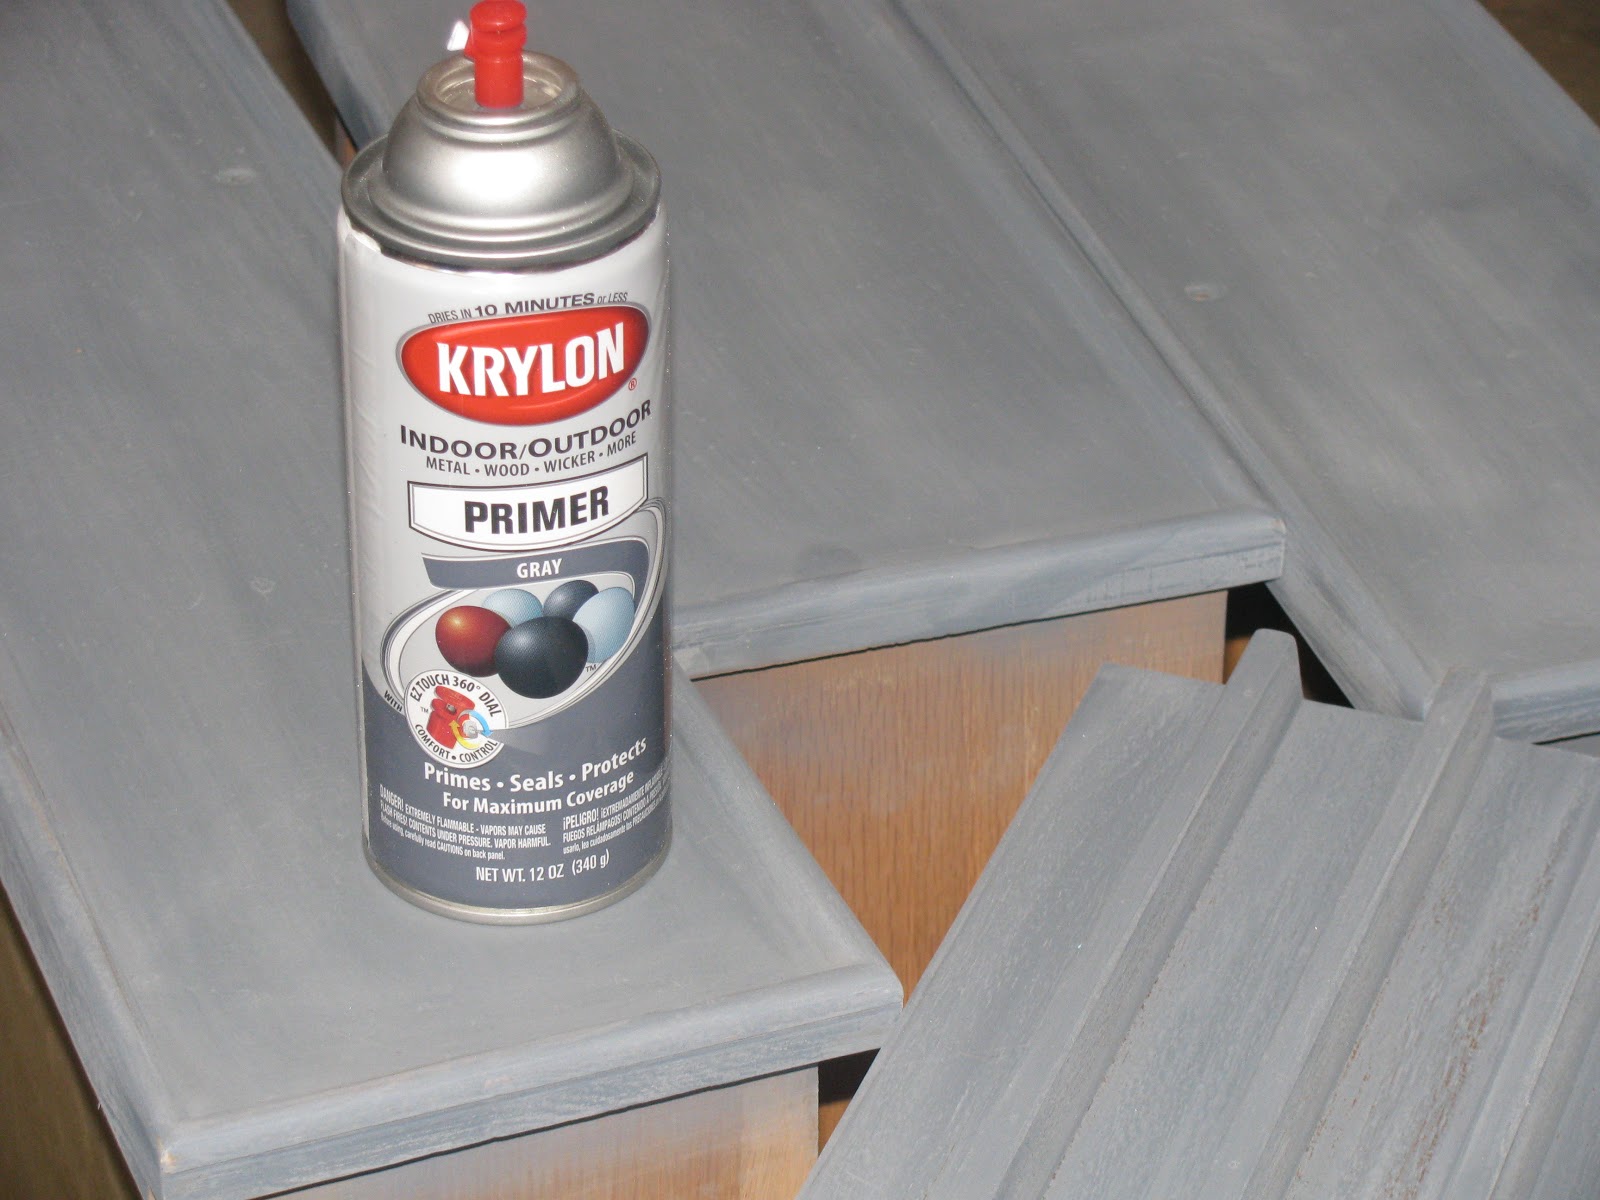
I primed with Krylon grey primer,
and sprayed with Metallic Silver.
It was very shiny....

After this I applied a little bit of charcoal glaze. You can see the difference in the picture above. The bottom drawer has not been glazed yet.

Can you guess how I got this "stencil" effect above?

I really thought that I was the clever brain behind this technique, 
but alas, of course some other clever brain apparently thought of the same thing, because I saw it on Pinterest afterwards...
In case you have not seen this before, it is spray paint over a lace tablecloth.

 Isn't it awesome?

I really liked the hardware, and even debated to leave them bronze, but decided to spray paint them black instead.

Here is the final result...

I like it, but decided to try the silver leaf next time.
I think it would have looked really nice with the very shiny surface it gives you.

But, since my offset point is Craigslist, I try to always stay within a certain price bracket.


A sweet young couple bought it a week later. I saw the couch and chair they got on Craigslist on the same day, and I'm sure it is going to look awesome in their new home.


That's it, for now, but "tune in" to see my "Breakfast at Tiffany's" dresser soon!
Happy Thrifting!
Joining:


Funky Junk's Saturday Nite Special


Thursday, September 20, 2012

From Toy Chest to Shipping Crate

Hi Everyone!
I have heard and seen of shipping crates being turned into toy chests, but not the other way around...yet that is what I did with this ordinary, run of the mill chest I got on Craigslist.


I remembered to take the "Before" after sanding and stripping off the layers of thick, enamel brown and beige paint. The sides are MDF, and the top and ends are pine.
I roughed it up with some screws, a hammer, and even took a firelighter to it in some places...lol!


Then I applied some ebony colored glaze. I did not have anything else, and I was too impatient to make the steel wool in vinegar mix, which has to soak for at least 24 hours. There are many tutorials on how to do that, but here is a link to one. I was going for the look of old cedar. The pine part turned out pretty good, but the MDF was a different story....

I ended up painting this part red...just could not get it to look right.
I then dry brushed some more red on the other parts, too, just so it would look like it fit.


I found old vintage magazine ads of Pfluegers, a fishing tackle and equipment company, on line,  printed it out, and decoupaged it to the side. The writing was done free hand, from an example I found when searching for "shipping crates" images.


I don't know if you noticed, but I tried to make the corner strips look like metal. Painted it silver, and screwed some screws in. On one side I stenciled "THIS END UP" ,
 and on the other side I decoupaged a sign that says "HANDLE WITH CARE" .
I also drilled some holes and made handles out of rope for a more authentic look. (or so I thought, anyway)

I distressed the edges and sanded the  chest all over a few times during the process.
Also applied and wiped off the same ebony colored glaze  a few times. I just played until I got the look I liked. The decoupaged parts were sanded pretty heavily to make it look really old.


This is what the back looks like. Some random stenciling, and another sign decoupaged on.

O yes, and see the little stamp in the right corner? It says "product of the USA". I just used a plate as a template en drew it on with a thin brush. The words were just done freehand.

Well, I had a lot of fun doing this, and I can just see it in a boy's room with a fishing theme, or even as a rustic kind of coffee table in a TV room. 

What do you think?


Until next time, 
happy thrifting!

Sunday, August 19, 2012

Summer Projects:

Hi Everyone!

I know I have been MIA for a while now, but I have a good reason. I visited my home country and family in South Africa. For ten whole weeks! That's right, 10! But just in case you thought I just sat on my behind and sipped wine, you are wrong...
Some days I sat on my behind and sipped wine, and other days I transformed furniture and sipped wine.... so there!
Yep! My sisters made me earn my keep... (but you know I did not complain about saving old, neglected furniture from the dump!)

Look at this piece for instance: was once a built in kitchen cabinet, then stuck in the laundry, and eventually in the garage, where, as you can see, it had been used as a handyman table.

Old Built in Transformed to house a Stereo


My sister needed a place for one of her twin 16 year old sons' stereo, so we went to work on it. I liked the look of the sanded wood on top, so we just sanded it thoroughly (with NO palm sander available, I might add), and waxed it. We painted the body with homemade black chalk paint, and wiped a little brown stain over it, to give some depth to the mat black color.  After distressing the edges, and  adding wheels and funky hardware, this piece was transformed into a very cool, industrial look entertainment center any teenage boy can be proud of.

Don't you agree? And yes, I know the handles are different sizes. And no, it was not on purpose, OK? After we had drilled the holes and attached them, we stood back proudly to view our handy work, and  broke out in hysterical giggles when we realized our  mistake....
Then we decided to just pretend it was meant to be that way.


Old Bathroom Cabinet transformed
This little cabinet was brought home from the farm, and was stuck in storage for forever.
We had specific  plans for it, but it knew better....


When we started to sand it down, all these lovely layers, added through the years, were uncovered.
Then we realized that the door was not real wood, but supa wood...and, soon after, while I was sanding my heart out, the door fell open, slammed on the ground, and the mirror broke. This is when we decided to just go ahead and take the door off.

The lovely blue color on the inside, was left just as is...

..and just check out all the wonderful old layers...blue, green, yellow and white.
We did not bring a paintbrush near it..this look was achieved just by sanding!

It is going up as a shelf in her powder room.
Love it!

See ya soon with more Summer projects!