Saturday, January 28, 2012

Fun Bench...just for fun!

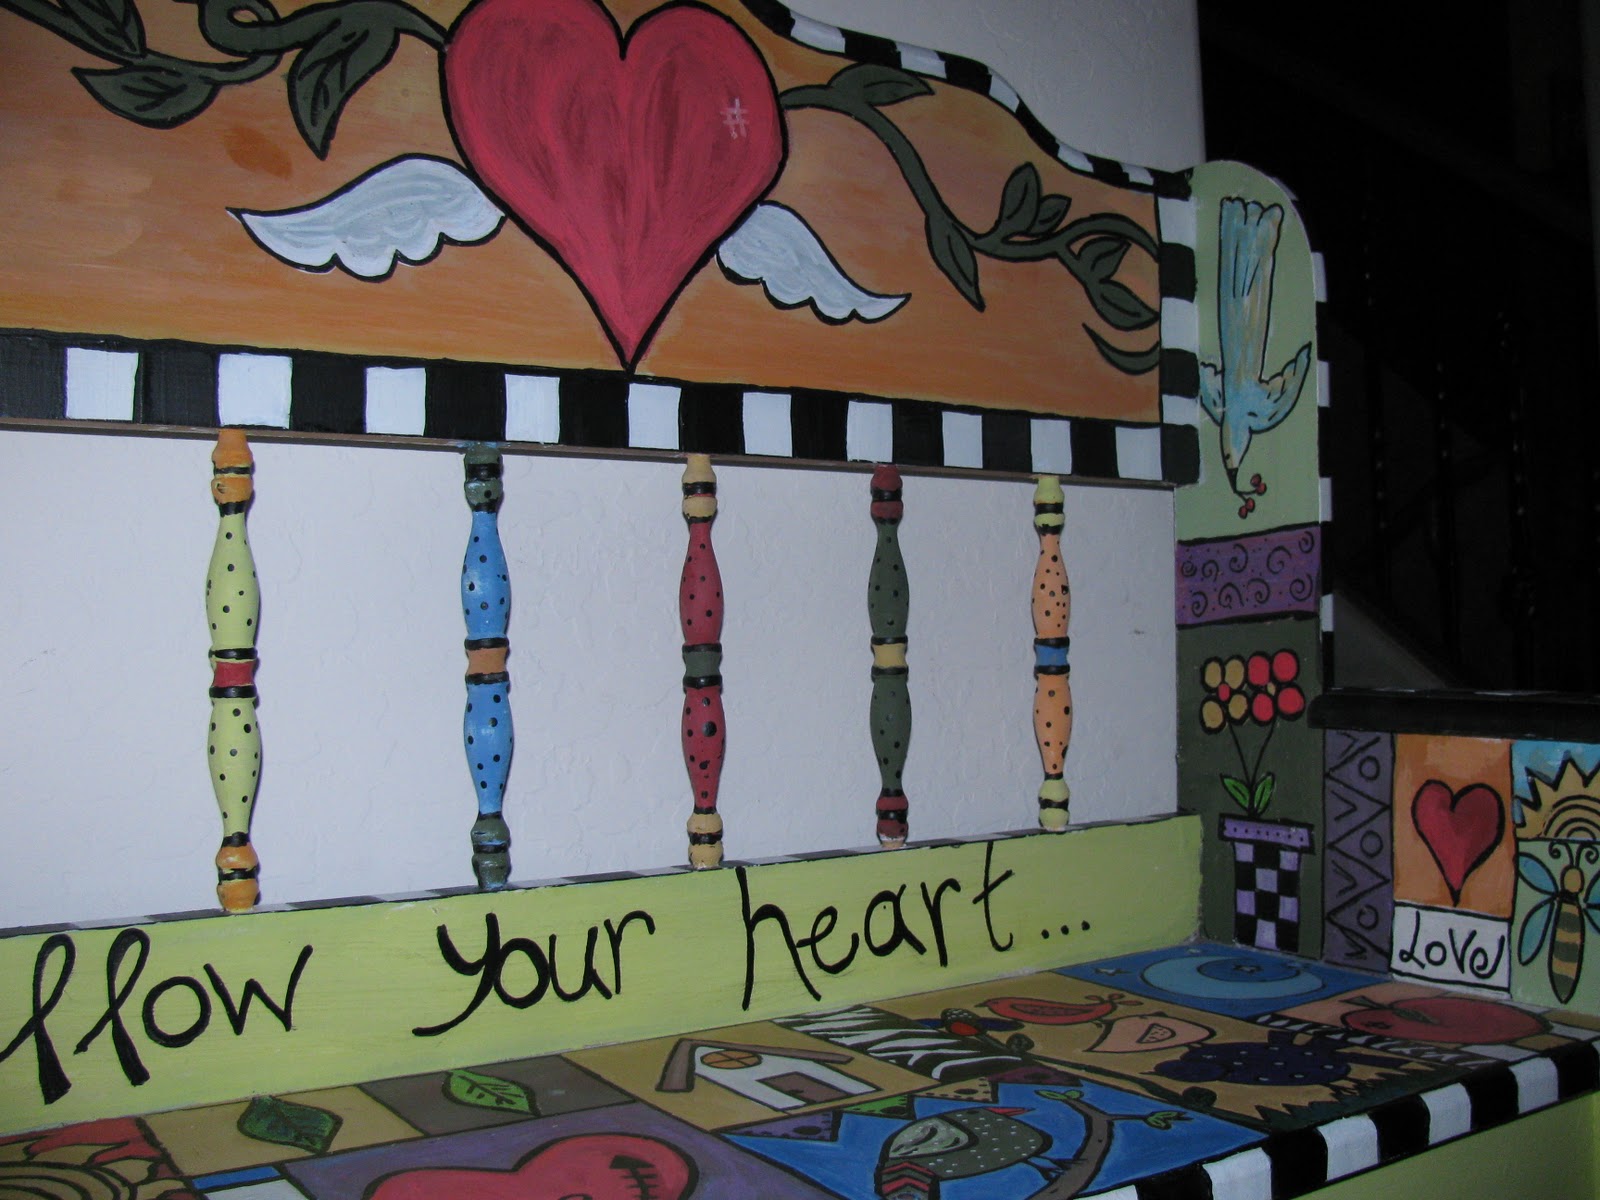
I bought a cute little bench at a garage sale a few years back. Since then, it has occupied many different rooms and played many different roles in our house. First it was used in my daughter's bedroom to hold all of her different soft toys....

Then I moved it to my guest bathroom, where I thought it fit perfectly....just to look pretty and maybe hold the occasional item of clothing while someone was taking a shower...

One day I decided to paint it, and moved it outside to the patio, where the poor thing resided, half-way primed, for a whole year!
I am surprised it survived the elements all that time. Must be of good "stock"!

Last week, I decided to tackle this brave little bench again. I was itching to do something resembling "Sticks furniture".
I have LOVED Sticks Furniture since the first day I saw it about 8 years ago. I did not know who or what it was, but I WANTED it! Unfortunately I could not afford to pay $3000.00 and up for any piece of furniture, so it remained an unrequited love affair.
Until I started painting old thrift store furniture and realized I might even try my hand at something like that one day!
Well, the day has arrived! And I had tons of fun doing it!

I removed the original embellishment, and was going to glue a wooden heart there, but ended up just painting one on.

 I wrote: Follow your heart....but take your head with you..


 I used any and all the paint I could find in my stash. The lines were done with Sharpies and paint pens.


 I think this can be used in a child's room, or playroom, or even as an unexpected accent piece in any decor. I am sure it will also look very cute on either a back or front patio, too.

What do you think?

Suzanne


Joining all these parties

Monday, January 16, 2012

French Label Dresser


Hi! Hello! And Happy New Year to All! I hope everyone had a wonderful festive season, and that all the new years resolutions are still in tact..

I'm just going to skip right ahead and show you my latest project...

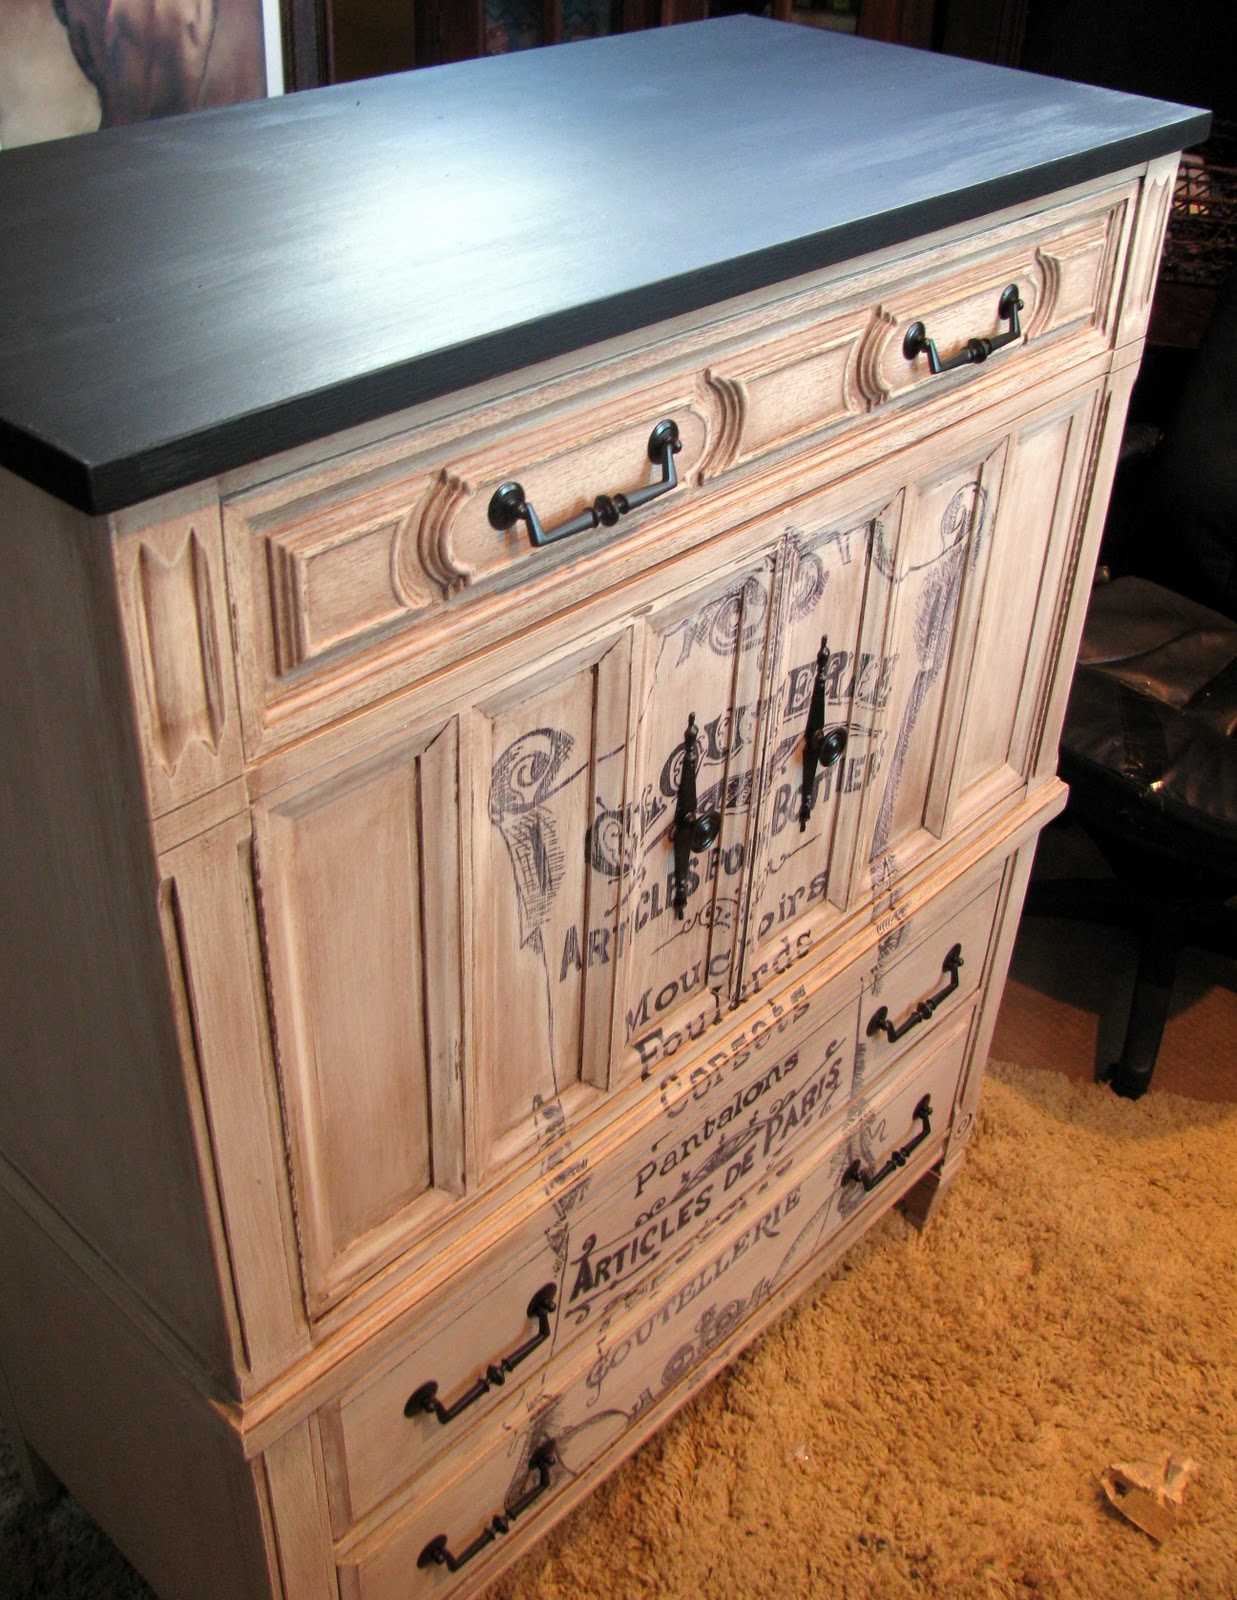
I found this beauty at my local Goodwill....is it just me, or is she beautiful ?
If I wasn't such a paint freak, I probably would have liked her just as she was....or maybe not...
Anyway, there is a stamp on that says Italian Marquee by Kent Coffey.
So, in the wake of all the nice French lettering and labels, etc I have been seeing on blogs lately, I just had to go visit The Graphics Fairy to find a nice french label or something to put on this dame.


This is what I came up with.

This is my third piece I have done with homemade chalk paint, and I LOVE it! 
I use 1/3 plaster of paris and 2/3 paint...and it works wonderfully! No sanding or priming...really!
The finish is a little course, and if you want a smooth finish, you would probably have to sand with fine sandpaper between coats as well as after, but I liked the look, since it was supposed to look worn and a little chipped.
So, after two coats of homemade chalk paint, I had to wait for night time, so I could use my new handy dandy little Tracer art projector.
I printed a small, (5"x5") copy of the label on Graphic Fairie's blog, put it under the projector, and started tracing the lines with a sharpie. I went over it afterwards with a paint pen, but apparently you don't even have to do that...the sharpie will stay put.


Once the ink dried, I applied a brown tinted glaze, and wiped off, to get the above effect.
Then a little sanding and distressing. 

I used the original hardware, because I liked it, and just sprayed with Oil Rubbed bronze.
 With the hardware on, I thought that painting the top black would look much nicer, and I think I was right! Don't you agree? As a finishing coat I applied two layers of Minwax Finishing Wax..just the clear. It gives the piece a nice, satin sheen.

I'm very happy with how this turned out, and can't wait to use my little Tracer again! What will it be next? 
The child bench, the bulky dresser, or the telephone table?  Hmmm.....Stay tuned! 


Love,
Suzanne

Linking up to these and other parties:
<div align="center"><a 
href="http://micheleravendesigns.blogspot.com/" title="{Primp}" 
target="_blank"><img 
src="http://i4.photobucket.com/albums/y103/amycarver3/primpbutton2.jpg" 
alt="{Primp}" style="border:none;" 
/></a></div>


Monday, October 24, 2011

Ugly Light Fitting Repurposed


You all know and have seen these old ugly lights at Goodwill...they are a dime a dozen everywhere.
I bought two a veeeery long time ago, thinking I could make cool chandeliers out of them...

This was the one after my (unsuccessful attempt).

It used to be one of those copper colored lights with the glass shades.
I turned the "arms" up, sprayed it ORB, and added little black shades.
Somehow it still did not do it for me, so back in the closet it went, for about another year. 

When I saw what this very clever gal from Dreaming in Color did with her old light fitting, I just had to try it, too.


With the help of some blue spray paint, Gorilla Glue, and my grandmother's little desert plates, I transformed it into this....


The little bowl on the top is not glued on, so that it can either be used to hold mints, or teaspoons, or it can be removed to just use the plate underneath.

 And here it is with some yummy Baklava snacks...
The fake pearls just add a touch of whimsy.


Hope you like it!
Happy Haunting!


Joining all these parties

Saturday, October 15, 2011

Mermaid Halloween Outfit


I'm sure everyone of you out there with young teenage girls know about the TV show, H2O . The one about the Mermaids? Well, of course my 11 year old now wants to be a Mermaid for Halloween. Heck, I think she even wants to be a Mermaid when she grows up!
I agreed, thinking, that should be easy to find...uhm, no!
She is too big for the kiddie outfits, and the grown-up outfits are a bit...how shall I put it....
I'll let you judge for yourself..
Not something I want my little girl to go Trick or Treating in.
Since she had her heart set on being a mermaid, I decided to try and make one myself.
Now, if you knew me, you would know that I don't sew. Dropped out of sewing classes not once, but twice! Just too tedious to my liking.
I do own a sewing machine, though, that I use from time to time to fix  or hem something.
All this to say that for me to decide to attempt something like this, was a sign of desperation!
I went to Hobby Lobby and got the fabric:

This for the tail part...
 ..and this for the tailfin.
I cut the tail fabric to make a point in the middle like this..
Sewed the back closed to make a skirt..

Folded the sheer piece to make a double layer, and gather stitched it , together with a strip of the blue satin to make one long, gathered strip.


 Then I just stiched this piece to the skirt part, and

Viola!
 O, yeah, and I put an elastic in the waist.

 Got the bra top at Savers. We might sew shells onto it..will see.

And don't worry, she won't be cold. This is Phoenix, remember? Kids have to stay hydrated on their trick or treat walk. LOL
I hope you could follow with all of the very technical terms I used,  but there you have it..a Mermaid Outfit for $16.00.
Happy Haunting!


Joining all  these parties

Monday, August 8, 2011

Frenchy Armoire

Hi Again..

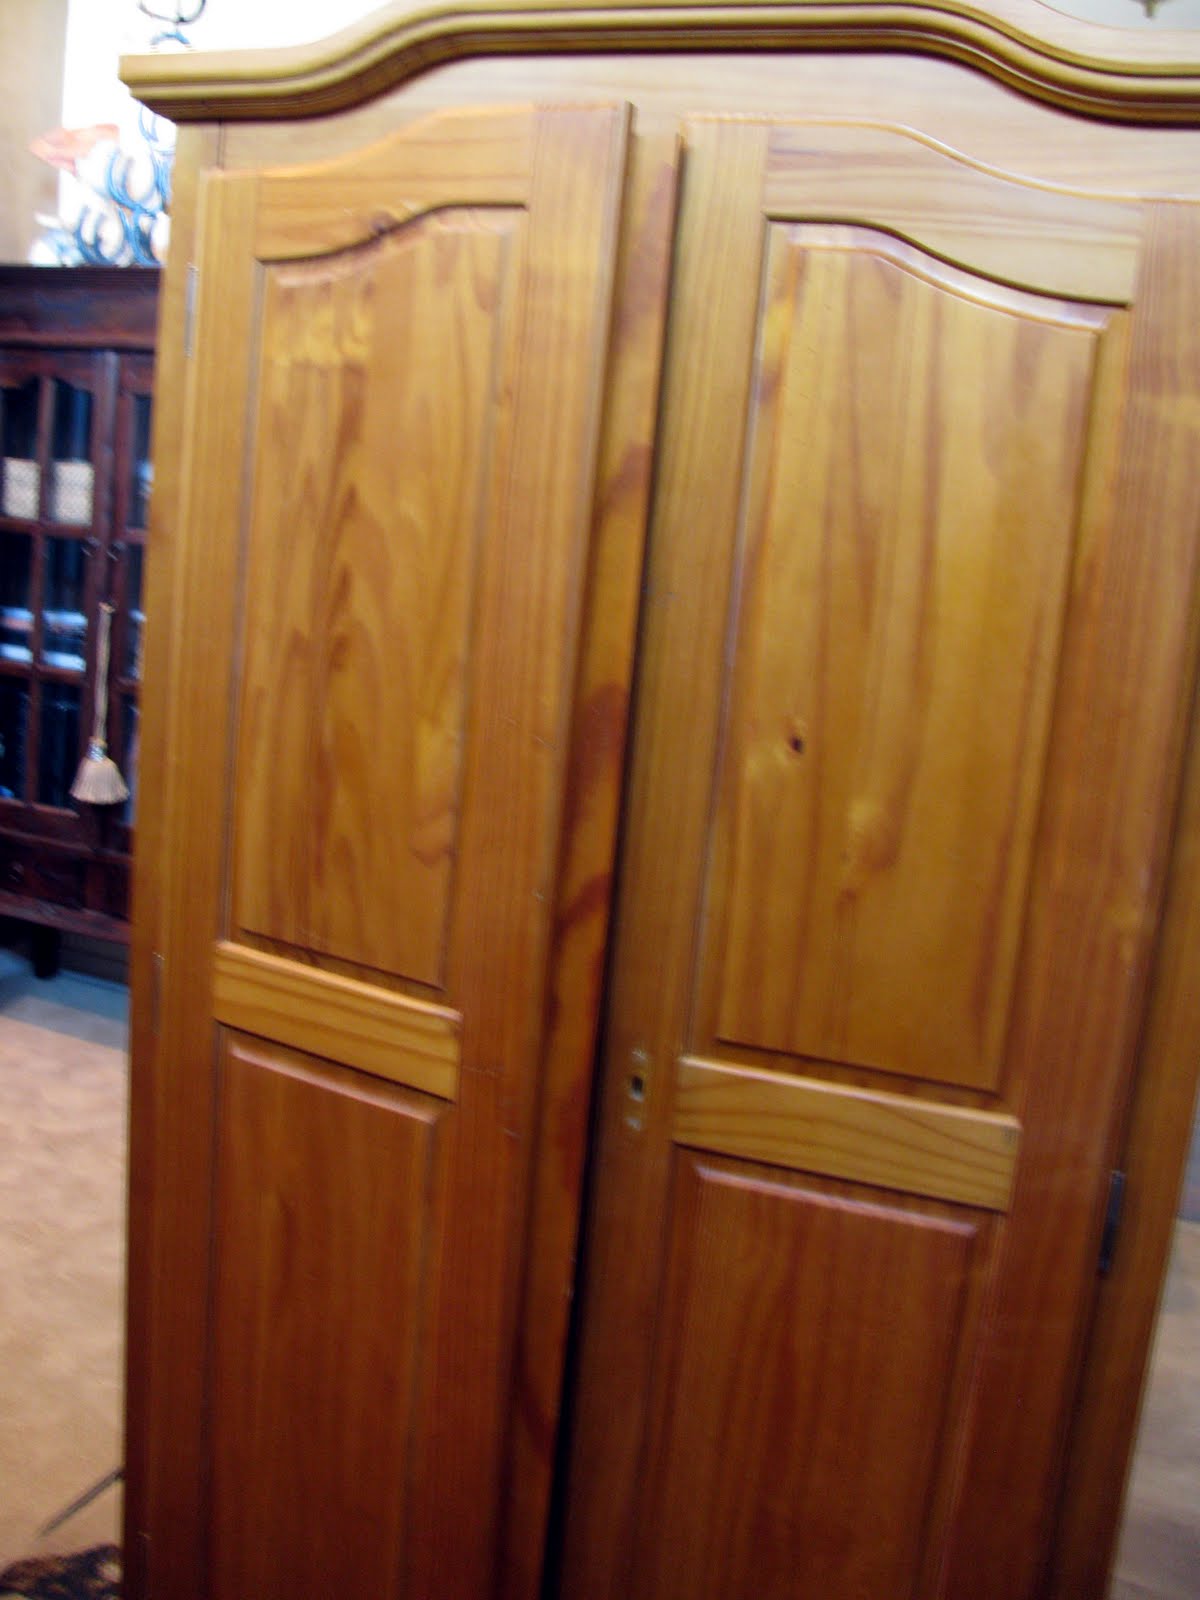
Remember the "before" picture I showed you in my previous post? A "Preview of Coming Attractions" of sorts? Of course you do, you clever so-and so.
But just in case you wanted to see it again, here it is...
The lock was broken, and the doors would not stay closed.That was fixed easily enough by a trip to Ace Hardware. I did not worry about the lock. Just pried it off and filled the hole with wood filler.
I decided to try the Glidden 2 in 1 Paint and Primer , in black. After usinng the Cabinet Transformations kit in my previous post , I wondered how a regular deglosser off the shelf would work instead of sanding.

I think it worked fine ,  but I don't think I will do it again. I still feel a light sanding is better.
So, after two coats of black paint, a black glaze and  some sanding to distress, this is what it looks like.


 I really liked the french writing I have been seeing on quite a few blogs now, and wanted to incorporate it in this project.The door panels were so narrow, I couldn't do a decent design on them, plus , wouldn't it have looked funny to have it repeated four times?

 I remembered that I still had wall paper with french writing on.
I think it worked great..
  I also sanded and glazed the paper a little bit, to give it an older look.

Did you notice thehandles? I bought them a year back at the Habitat Restore.

One last look:
Before..             


After

Hope you like it, too!